Flute Octaves: Reaching Higher Notes Without Forcing

Most notes in the flute’s second octave use exactly the same fingering as the note an octave below. What changes is the air: a faster, narrower stream, aimed from lips that have moved slightly forward. Blowing harder, pinching the lips or rolling the flute toward you are the usual ways a beginner tries to force the jump, and they are also the usual reasons the upper note cracks, sounds pinched or refuses to come out at all.
If your low notes already sound steady, your fingers already know most of the second octave. The work is in the lips and the air, and it responds to a few minutes of the right exercise a day.
Why One Fingering Can Play Two Notes
A flute has no reed. The sound starts when your air stream, which players call the jet, crosses the embouchure hole, the oval opening in the headjoint at the top of the flute, and splits against its far edge. The tube behind it can only settle on a note close to one of its natural resonances, and every fingering has several of them stacked above each other. The second one is very nearly twice the frequency of the first, which is an octave.
So with low G fingered, the tube is ready to play low G or the G above it. Your air decides which. The acoustics research group at the University of New South Wales, which has measured the flute in detail, describes what a player does to reach the higher resonance: blow with more pressure, which speeds up the jet, and move the lips forward so the air has less distance to travel to the edge. Flutists are also usually taught to make the lip opening smaller.
That is why forcing works against you. The pressure rises a little, but the useful change is a smaller opening and a shorter distance, not more air. Push more air through the same wide opening and you mostly get the low note louder, or a crack between the two. A smaller opening turns the same breath into faster air without the extra volume. The air is also aimed slightly more across the hole for upper notes, and slightly more down into it for low ones.
Our guide to beginner flute tips covers the basic embouchure, meaning the shape of the lips and the air stream. The second octave is the same embouchure with three small changes: a smaller opening, the corners of the lips moving forward, and a faster stream of air.
Same Keys, With Two Exceptions
Here, low D is D4, in the space just below the treble staff, and middle D is D5, on the fourth line. Our guide to reading sheet music covers the staff itself.
From E on the bottom line of the staff up to C sharp in the third space, every fingering repeats unchanged an octave higher, from E5 in the top space up to the C sharp on the second ledger line, one of the short extra lines drawn above the staff. The two exceptions sit at the bottom of the second octave. For middle D and middle E flat, you use the low fingering but lift the first finger of the left hand, the one closest to your face.
Lifting that finger opens a small vent hole, which helps the air settle on the upper resonance rather than the low one. If middle D keeps falling back to low D, check that finger before changing anything about your lips.
On G, A, F or E, a wrong upper note is almost never a fingering problem, because the fingering is the same one you have been playing for weeks. The air is the only variable, which makes those notes the right place to learn the change.
Four Exercises, in Order
These go in the order they get harder. Set a metronome to 60 and count four beats for each note. Play the upper note at the same volume as the lower one, or softer. Matching the volume makes the change come from air speed rather than force. Move to the next exercise when the upper note speaks cleanly three times in a row.
1. Octave slurs on one fingering. Finger low G, on the second line. Hold it for four beats, then slur up to the G above the staff, meaning you move to it in the same breath without restarting the note with your tongue, and without moving a finger, hold four, slur back down, hold four, then breathe for four. Change nothing but the air and the lip position. Repeat it three or four times.
2. The same on the other shared notes. Do the same on A, F and E. If one note will not slur, keep working the ones that do for a few days, then try it again.
3. Harmonics on the low D fingering. Finger low D and, still without moving a finger, blow D4, then D5, then the A above that on the first ledger line. This is the harmonic series, the stack of resonances described earlier. Neither this D5 nor the A uses its normal fingering. It is an exercise in changing the angle and speed of the air alone. Patricia George, writing on embouchure in The Instrumentalist, recommends this starting on low D and going up and back down again, and warns against rolling the flute to find the notes. The embouchure hole stays level.
4. The two notes that change. Play low D, then middle D by lifting the left first finger. Then low E flat to middle E flat the same way. Here the finger and the air change together, which is why this comes last.
The whole routine takes about five minutes. On the flute, the muscles around the lips tire quickly for the first few months, and a tired embouchure is exactly the one that starts pinching. Stop while the upper notes still sound good.
When the Upper Note Will Not Come: A Troubleshooting Order
Check these in order. The first takes seconds, and the last needs a repair shop.
1. The fingering. On middle D and middle E flat, is the left first finger up? On everything else between E and C sharp, the keys should be identical to the low note.
2. The volume. Try the upper note softer. If it appears when you play quietly with a smaller opening, you were supplying volume instead of speed.
3. The lip position. Bring the corners of the lips slightly forward, which shortens the distance the air travels to the edge. Shelia Del Bosque, writing for Interlochen, describes the corners moving slightly forward for the second octave and further forward for the third, and warns that overdoing the adjustment in either direction makes the note leap up or down an octave.
4. How the flute is turned. Rolling the headjoint toward you to find a high note covers more of the embouchure hole, which dulls the sound and tends to pull it flat. The lower lip should cover about a quarter to a third of the hole, and that should not grow much as you go up.
5. Tension. Pinched lips, a clenched jaw and raised shoulders all come from trying harder. The jaw hangs relaxed and the throat stays open. Tightening narrows the tone instead of lifting it.
6. The flute. If one particular note fails every time while its neighbors work, the instrument may be leaking at a pad that no longer seals. A repair technician can test for leaks, and no amount of embouchure work fully makes up for one.
How Long the Second Octave Takes
The second octave usually comes after the first one sounds reliable, not alongside it. On flute, a tone you can count on across a whole phrase often takes two to three months, and our guide to how long it takes to learn the flute lays out the months around that.
Fifteen to twenty minutes a day, five or six days a week, with the octave exercises near the start once the tone is warm, is the load that suits most beginners. Short and frequent beats long and occasional here for a physical reason, not only a motivational one: the lip muscles need recovery. Our guide to practicing music at home covers building sessions like that into a week.
Record the octave slur on G every four to six weeks. Played back later, the recording reveals changes too gradual to hear from one day to the next.
What a Teacher Sees That You Cannot
Most of what goes wrong in the second octave happens at the lips, where the player cannot see it. A teacher watching on camera can tell whether the opening is too wide, whether the corners are moving forward or the whole mouth is tightening, and whether the flute is rolling in as the note goes up. Our guide to a first flute, clarinet or saxophone lesson covers how those early lessons run.
Joyce L. teaches flute on Tunelark and holds a master’s in music from the San Francisco Conservatory of Music, where she studied with Timothy Day, longtime principal flute of the San Francisco Symphony. Kathleen L. earned her master of music at New York University, has taught for more than 13 years, and teaches flute alongside piano, recorder and saxophone.
Kathleen plays the Allegro Moderato from Carl Nielsen’s Flute Concerto in a live recital. A concerto uses the flute’s full range, which is where this octave work leads.
Performance · Nielsen Flute Concerto, Allegro Moderato
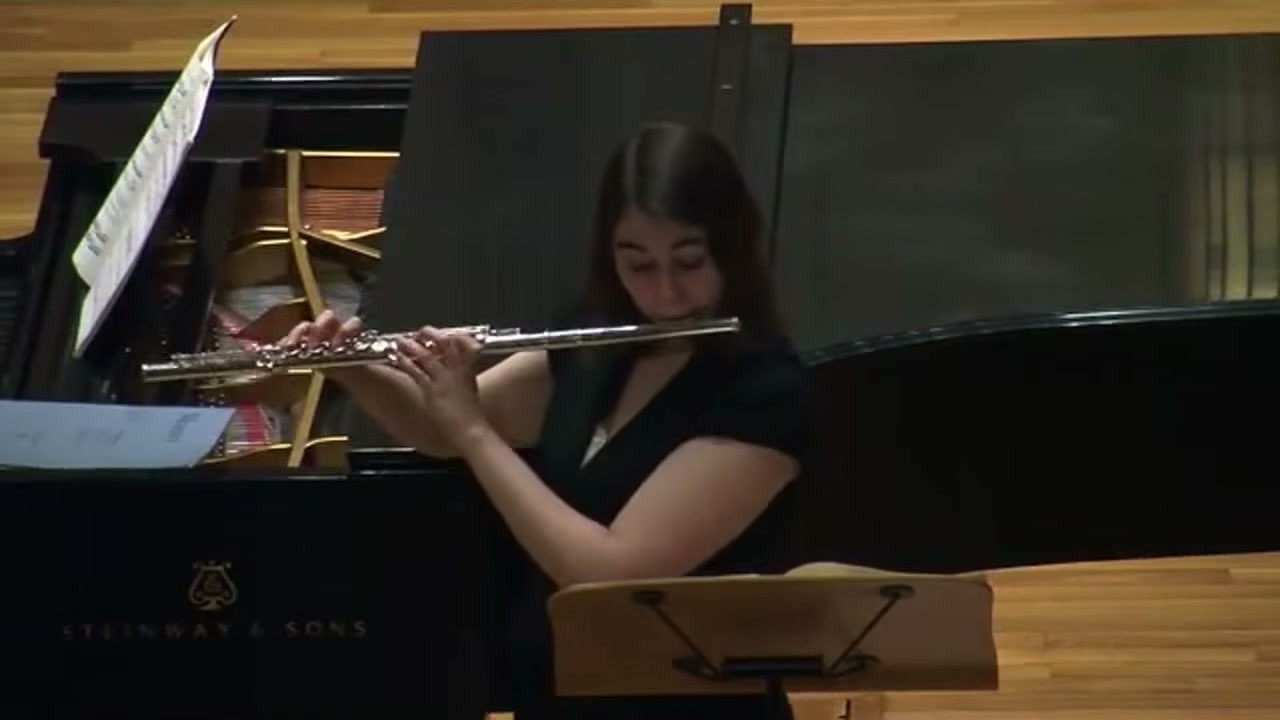
Kathleen teaches flute on Tunelark. View Kathleen’s profile
How to Find a Flute Teacher on Tunelark
Every Tunelark teacher is vetted by working musicians and educators for teaching quality before they can list. Every teacher sets their own rate and shows it on their profile, and scheduling, billing and support are handled for you.
1. Open the teacher list and filter by flute, then read the bios and watch any video a teacher has posted.
2. Look for a teacher who mentions tone, embouchure or the upper register, since that is the work this stage is made of.
3. Book a trial lesson. It costs the teacher’s 30-minute rate minus $25, so trials start at $14.
4. Bring the octave slur on G and let the teacher watch your lips as you play it. That one exercise shows most of what they need to see.
Frequently Asked Questions
My low notes started cracking upward after I practiced octaves. Did I break something?
No. It usually means the faster air from the octave work is carrying over into the low register. Play a few low notes softly with a slightly larger opening, aiming a little more down into the hole, and give the low register its own share of each session.
Does the third octave work the same way?
Partly. The air keeps getting faster and the opening smaller, but from the D above the staff’s second ledger line the fingerings stop repeating, and each note has a shape of its own to learn. Most teachers wait until the second octave is reliable before starting it.
Should my upper octave be louder than my low octave?
It tends to come out louder, and that is fine in a piece. Volume is easy to add once a quiet upper note works, and much harder to take out of a forced one. A tuner app is worth using here too, to check that the upper note sits in tune with the low one.
Are the fingerings the same on a piccolo?
Mostly. The first two octaves are fingered the same, though the piccolo has no low C or C sharp and some of its top notes differ. It sounds an octave higher than written, and its much smaller embouchure hole asks for an even smaller, faster air stream.
Can a teacher fix octave problems over video?
Yes, if the camera can see your face. Set it at lip height, about an arm’s length away and straight in front of you, so the teacher can see the opening between your lips and how the flute sits against your chin. Turn on your video app’s original sound setting too, so the higher notes are not filtered out as noise.
Keep reading
About Jennifer Heath
I'm Jennifer Heath, VP of Operations at Tunelark and a lifelong singer. I joined the company in 2020 and oversee much of what makes Tunelark work for students and teachers: hiring, training and supporting our instructors, student support, marketing and day-to-day operations. I started voice lessons at 7 and sang with touring choirs through my teens. Music belongs in every life, for the self-expression, the discipline, the comfort and the simple joy of it.